Pages

Showing posts with label Quilt Inspiration. Show all posts

Wednesday, June 12, 2013

Sneak Peak

Hello Everyone,

Here is just a sneak preview of something going to be published in a magazine. It is a quilt pattern that I designed that was sewn using Indian Summer fabrics. 
I had originally designed the pattern to show off trends in micro quilting. I thought it would really play up the fabrics if each triangle was different shades of the same color. As you can see, the quilt pattern is such a great design it works well with any fabric collection. I really like how it is turning out. 

What do you think? Do you have a triangle quilt you are working on or love?

From Megan With Love

Tuesday, May 21, 2013

Portland Spring Market 2013

Hello All,

I just got back from Spring Quilt Market 2013! It feels so good to be home, and I wanted to share some pictures with you of the booths that I worked on. 


For the Art Gallery Fabrics booth we had four store windows to create a storefront feel. The first window was the "Sew Fashion" store window. The ball gown that Zayda and I made is made up of over 1,000 3"x 3" squares. We spent many an hour cutting out and sewing squares. There is at least one print from every AGF current collection on the dress. I really love how the dress turned out, it is very quilting meets high fashion. Who doesn't love a little quilt couture!


The next store is a double window display for the "Quilt Shop". It showed how the fabrics go from the bolt to the quilt. There were a stack on mini bolts and a beautiful hanging quilt. The last window was "A Happy Home" which had a mountain of pillows swinging on a wooden rope swing. The store displays became a sort of street through the middle of market. 

Across from the street was the "Pure Elements" booth. These little butterflies were my babies for weeks. Each butterfly is made of the Pure Elements fabric that I mounted on Bristol paper and then cut out. The effect of them all hung on the wall was breathtaking. They were attached to the walls with pins and when the fans would come on they would move and flutter in the breeze. I want to make them again for a wall in my sewing studio but I haven't gotten around to starting on all of them again. I will keep you posted on that. 


The booth was filled with samples of work using Pure Elements and free sample projects to give away. You can see the butterfly applique pillow at the bottom. Everyone loved the pillow pattern and samples, we could hardly keep the boxes full. I am truly proud of how all the butterflies and the projects turned out. 

Here is a video that Kat did of the market that I am in. Enjoy!


Thank you for visiting!

From Megan With Love

Wednesday, April 24, 2013

Say HELLO to Navy and Yellow!

Hi everyone!

Spring brings sunshine and a jolt of color to the quilting world. It is the perfect time to stock up on brights for renewed energy to brighten your day. Combinations of yellows and blues are the perfect mix of warm and cool. I predict that navy will be the new black for spring. This color can be very modern in quilting but with a neutral, calming feel to it. Also, you can never go wrong with shades of blue.
From cobalt to indigo, near black to true navy, dark blue is showing up everywhere. It is showing up in upholstery, on walls, in accessories and lighting. The blue and yellow combination is a new take on maritime blue.
It can even inspire cool and edgy decor for the home. Here is a little tutorial on how to combine these fresh Spring colors.

Start with something small like the table runner you see here. It is the perfect way to embrace yellow and blue with just a little bit of the nautical vibe that is so trendy right now.

The runner measures 33" x 12" when bound. All of the seam allowances are 1/4". The center block is a log cabin block made with 1 1/2" strips. The finished size of this block is 11.5" x 11.5". The two side blocks are made up of white strips that are 2" x 11 1/2" and strips of 1 1/2" colored fabrics that are pieced and then cut to 2" x 11 1/2". The finished size of these blocks are 11" x 11.5". The three blocks are then sewn together. I like to do my backing and binding in one with a wrap around method. 

I hope this inspires you to keep on sewing.

Thanks for visiting! I would love to see what you do, please feel free to share or comment.

From Megan With Love

Wednesday, April 3, 2013

Indian Summer

Hi Everyone!

I just wanted to share with you that some of my sewing and quilting work was filmed in a new video for AGF. I know I shared a few leaked images before of that I was working on and now those should make more sense. 

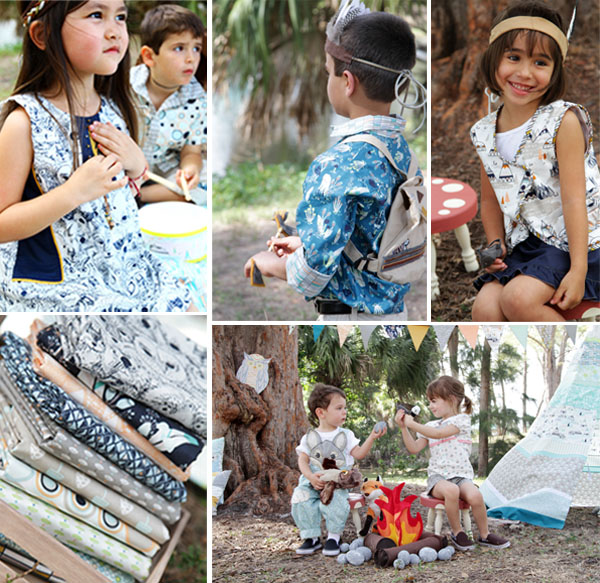
Discover the fantastic world of Indian Summer, a collection by Sarah Watson, inspired by a hot summer day during fall and the cutest little creatures living in the woods.


This collection inspired me to create a world full of whimsical quilts, cute stuffed raccoon and adorable little garments.

Here is the adorable video where you can see everything.

From Megan With Love

Friday, March 29, 2013

Sneak Peak

Hello Everyone,

Here is a sneak peak of the tent I have been working on. 
I am so happy with how it came out. I was thinking of doing a tutorial but decided to let people ask for the pattern if they want to make their own. I would love to make a mini one for Jabba. I don't think he would ever come out. It was a lot of fun, I found myself playing in it. I think it came out great and the kids loved it. 

Did you have a tent or make forts as a kid? What was your favorite part of summer camping?

From Megan With Love

Friday, March 22, 2013

Works In Progress

Hello All,

I just wanted to share with you what I have been working on for the last two weeks. I have been sewing and painting up a storm. I have been working on props for a video that is going to be shot this weekend in the park. 
This is what I get to work with. How lucky am I?

Here I am painting some of the props for the trees.
How cute are these guys? They got to go on the road trip with Mike and I to the river. I was able to applique them in the car. I think they are just too cute.
Here are some of the finished painted props ready to go.

What have you been working on this week? I would love for you to share it with me.

From Megan With Love

Tuesday, March 5, 2013

Happy Birthday To Me!!!

Hello Everyone,

Happy Tuesday! Today is my Birthday! I just wanted to quickly share with you what I have been working on in my sewing studio. I can't share too much because it is going to published in a magazine with patterns and instructions but here is a tiny peak. 
It is going to be an appliqued owl pillow. I am so excited that it is coming out so cute. I am going to put a zipper in the bottom so the cover can be removed from the form and washed. It is designed for children but I see this cute  little owl sitting in my office with me. 

I would love to hear what you are working on.

From Megan With Love

Wednesday, February 20, 2013

The Elle Skirt

Hi Everyone!

I just wanted to share with you that I was mentioned today on the AGF blog for the work I did on the Elle Skirt Tutorial. 


Now I want to show you this super simple and fun skirt that can be dressed-up or it can be worn casually to run every day errands. I majored in Fashion Design and since I've been working in the quilting industry for a while now I have started to incorporate quilt block designs and piecing into my garment creations. For this skirt there are no patterns required, just simple rectangles. This is not a “quilt” block tutorial, but I guess we can say it’s a block skirt tutorial with a paper-bag waist detail.

The fun part is that it’s a very easy and quick project you can create to gift to someone. If you have a special occasion you can pick glittery trims, apply fun beads, and make a modern and chic statement with your creation. Let your creativity be free!

This time I made a sample 6 size skirt because I was experimenting , but if you need to add some width to it, simply measure around your hips, divide that by two, subtract THIS skirt’s width measurement (19”), divide what you got by four and add that measurement on each side of the back panel, and widthwise to pieces 1, 2, 4, 6, and 7. You can also decide the length that you prefer; this could be either a fun mini or maxi skirt.

Since the pattern is kind of like a puzzle, I will number the pieces to make it simpler as we go. So cut these (you can use a rotary cutter!):
(1) 17 ½” x 7” rectangle 
(1) 3 ¾” x 7” rectangle 
(1) 21” x 3 ¾” rectangle 
(1) 3 ¾” x 10 ½” rectangle 
(1) 24 ½” x 3 ½” rectangle 
(1) 4 ½” x 13 ¾” rectangle 
(1) 28 ¾” x 6 ½” rectangle 
(1) 28 ¾” x 19 ¾” rectangle 
In addition you will need  22 ½” of ½” wide elastic and matching (or contrasting) thread.


Let’s start! Remember to sew all right sides together with a 1/4" of seam allowance.

Clean all the raw edges of each piece numbers 1-7 since they will be exposed on the wrong side of the fabric, you can do that with a serger or with a zig-zag stitch to prevent unraveling after washing.

I will write out all the steps but you can find a little diagram at the end to help you if you are more of a visual person (like I am).

Sew piece 1 to piece 2 on the width side, always put right sides together. Press seams open as you sew and proceed to attach that to piece 3 lengthwise. Press, press, press, and attach that whole new piece to piece 4, and then it’s simple, attach that whole piece to piece 5, then attach to piece 6 and finish by attaching that piece to the last piece of the front panel (piece 7). It’s just like playing Tetris except you sew as you go.


Now that you have the front and the back ready, you can close the side seams, again, place right side to right side and sew. You can clean those seams with the serger, or if you don’t have one, you can do a zig-zag stitch or even better you can do a French Seam finish on it. Once this let’s-call-it cylinder shape is done, fold and press inward ¼” on the top edge and from that new folded edge, measure 2 ¾” down, fold and press again. 

Now you will do a top stitch all around 1/8” from the first folded edge (the ¼” one). When you are done, do another top stitch 1” from the one you just created, by doing this you create the space where the elastic will go. To introduce the elastic, carefully use a seam ripper to undo a couple of stitches on one of the side seams in between the 1” space, this will give you a cavity to insert the elastic.


So the next step is to insert the elastic. You can attach a safety pin on the side that you are inserting first that way it’s easier to pull the elastic to the other side, also if you scrunch the fabric as you go it will make it easier. Make sure you hold tight to the other side of the elastic because if you let that end go, you will have to start over... so hold it firmly and avoid that.

Once you have each end coming out from the opening, put one on top of the other and sew them together lengthwise to secure the elastic well. You might have to “fight” with the piece a little bit, but if you gather all the skirt fabric toward the middle it makes it easier and peaceful to work with the elastic.

You can now accommodate the elastic in place, moving the fabric evenly so that it looks symmetrical. Close the opening by hand with a blind stitch making sure you don’t catch the elastic.

Now all you have to do is the hem. Press ¼” up and from there press 1” up. Do a top stitch all around 7/8” from the edge.

And you’re done! Style away, you can basically wear it anywhere, change the fabrics, add some accessories, and it’s a classic-with-a-twist way to make a statement.


I chose some other fabrics that you can use to change the look of the skirt, I created the digital doodle to show you how you can take this style from day to night:


I hope you enjoyed this tutorial and please share the photos of your creations so that I can share them with the world!

From Megan With Love

Tuesday, February 5, 2013

Color Me Retro by Jeni Baker

Hello Everyone, 


I just wanted to share with you the video for Jeni Baker's new collection, Color Me Retro. Those of you who know me personally know that I truly am a retro gal. I live and love a very retro lifestyle. I was so excited when AGF asked me to be a part of the video. I love Jeni so much and I wanted to make sure to make her proud. 


A collection that would make the likes of Donna Reed swoon, Color Me Retro by Jeni Baker inspires that retro chick inside of us.


Imagine yourself in a 1950's kitchen, singing along to some Billie Holiday as the scent of fresh baked bread fills the air.


Inspired by retro kitchenware from the 1950s and 60s, Color Me Retro invites you to paint your life with its bright, fresh combinations or lime green, royal blue, and raspberry red.


Think vintage silhouettes and classic decor for the home! Create your own retro style with this bold, fun, and vibrant collection!


 The 50's and early 60's were a time dubbed as "The Family Era". These were times when "keeping up with the Joneses" was key and Leave it to Beaver was a reflection of where society stood. It was considered a norm for women to sew their own clothing as well as clothing for the family...


Color Me Retro is a collection that embraces all that charm and nostalgia of that era and gives it to you in a mini-collection of 10 prints that will bring out the susie homemaker in all of you. 


I would love to hear what you think of the collection and of my acting debut.

From Megan With Love!

Friday, January 25, 2013

Photo shoot

Hello Everyone,

I was in my very first photo shoot today. Here is a little sneak peak of some of the images. The shoot was for a video I am going to be staring in, this is only a preview. 

This is me without any editing yet so please be gentle. 
This is my second outfit change.
My Pyrex even makes a debut in the film.

More to come. Let me know what you think.

From Megan With Love


Thursday, January 17, 2013

Inspiration With Love

Bonjour Everyone,

This morning as the smell of blueberry muffins filled my home I was hit with a spark of French inspiration.

Somewhere between "Danse, Danse, Danse"ing to Mika - Elle Me Dit and singing into my spatula I started dreaming of a weekend in Paris. In my mind I am strolling through Montmartre walking up and down hills, one rue after another of lace trimmings and antique buttons on original vintage cards. There is no place like it in the world. Just the thought of vintage buttons make my heart skip a beat.


I hope you feel as inspired as I am this morning. I have been listening to We are Enfant Terrible- Ce que tu veux de moi and dancing around the house in my fun Parisian state of mind.

I am going to go pour myself another cup of coffee, eat a muffin, fill my home with more french music and dream of Paris. Who's joining me?

I would love to hear from you!

From Megan With Love

Wednesday, January 9, 2013

Inspiration With Love

Hello Friends,

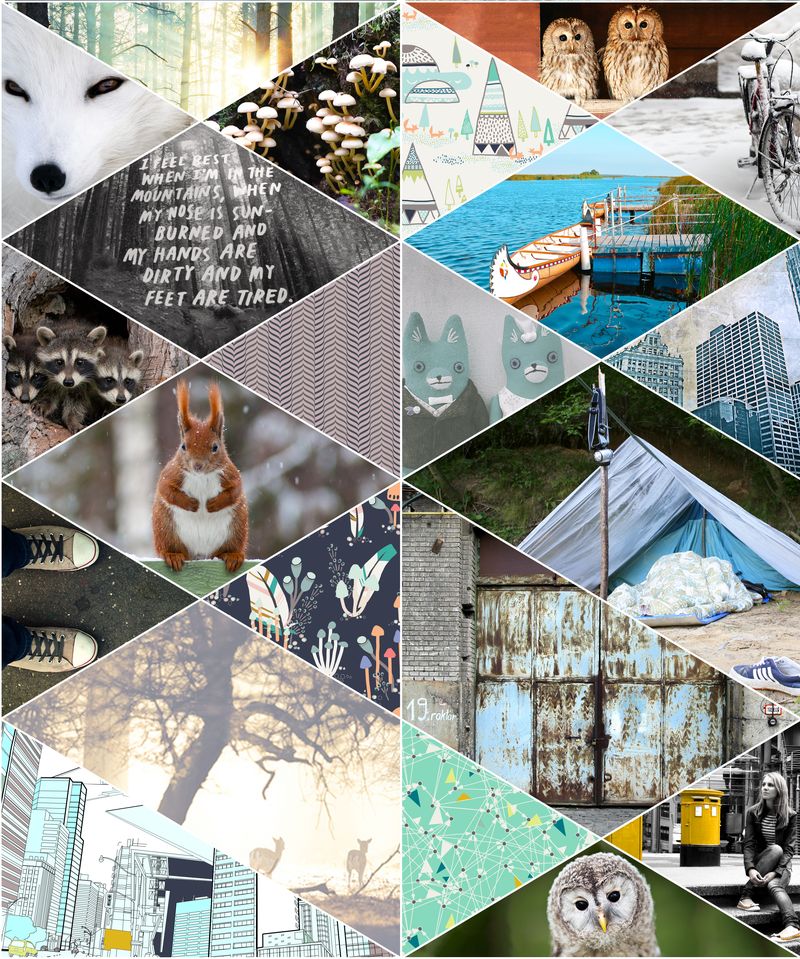
This holiday season I dreamed of travel and visiting my Mother's house. The snow downtown in the city and blanketing the forest in her backyard has Colored Me Inspired to sew. Inspiration can strike at any time. I am inspired by photos so I wanted to share with you some photos that inspire me to sew.

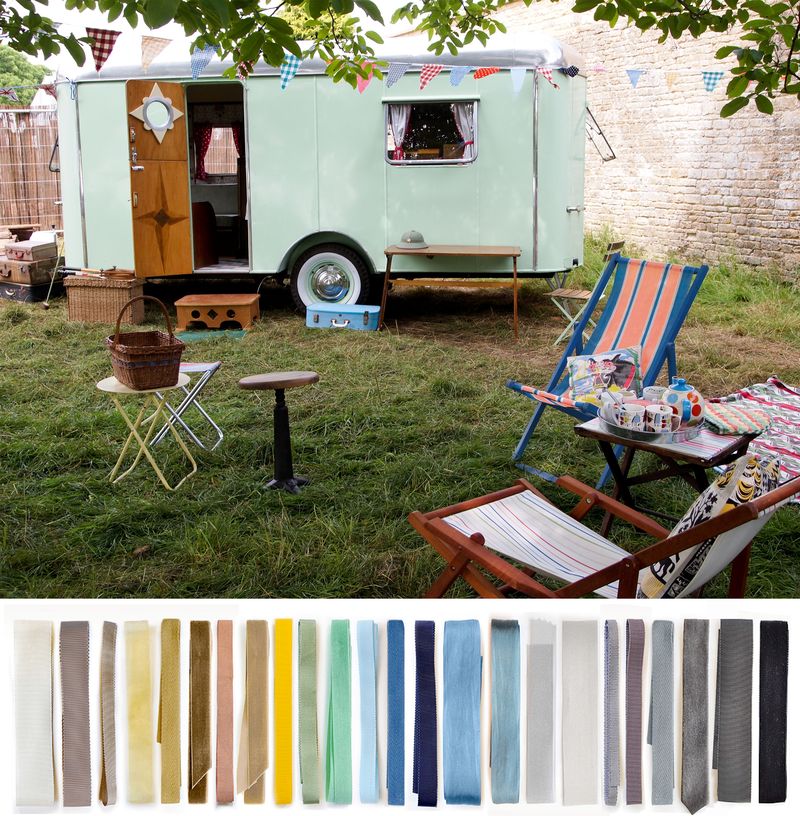
The inspiration all began with a photo. I have a deep love of travel and seeing a retro airstream makes my heart melt. I love to dig through my vintage aqua Ball Mason Jars with Zinc lids to pull out ribbon scraps to make inspirational palettes on my home studio design wall. 

The colors of nature are mirrored in the downtown urban environment. The patterns and symmetry are calming to me. I get an overwhelming sense of calm with the silence in nature. Inspiration can hit you at any time. Sometimes you just have to stop and take a deep breath to see the beauty around you. The squirrel in the bottom right corner made his impromptu debut at a park photo shoot. He is proof that both worlds of urban and nature can come together and overlap to provide perfect moments. 
Can't you just see the triangles as a table runner. Lindsay from Hawthrone Threads called my collage "very photo montage meets table runner." Now I just have to do a triangle table runner for Mom this weekend.
I would love to hear what inspires you.
From Megan With Love

Thursday, December 20, 2012

Making Dolls

Hello Everyone,

I have been making personalized dolls to give this holiday season. Here is a little sneak peak of what I have been working on. I am giving them out today so I can finally share photos. 
Here they all are in the process of sewing.
Here is everything I have been making all packed up and ready to go to work. I love to make decorated gift baskets that really add something special to the gift. 
Here are all the dolls under the tree. 

If you would like to make a doll like this yourself I would be happy to draft you personalized patterns to make your own. 

What are you making for holiday gifts  Do you like to have handmade holidays?

From Megan With Love